BPMS Help Manual for PM Account
Last updated: September 22, 2026
This is Project Manager Account details
Allocate Resource Module:
PM Account > Allocate Resource
The Allocate Resource module in the Project Manager (PM) account is used to assign resources (such as team members) to various project activities. PMs can define specific tasks, allocate hours, and manage activity tracking to ensure projects stay on schedule. It helps in monitoring resource utilization, project progress, and overall task completion. Click on “View” to view the logged hours.

Area Zone:
PM Account > Allocate Resource > Action Dropdown > Area Zone
The "Area Zone" dropdown allows the PM to define and manage different zones or areas within a project. This section is useful for categorizing specific project areas, such as floors or sections, and helps track work related to each zone. By selecting an area zone, the PM can assign specific tasks or work to that zone and track the progress accordingly.

Assign To TM:
PM Account > Allocate Resource > Action Dropdown > Assign To TM
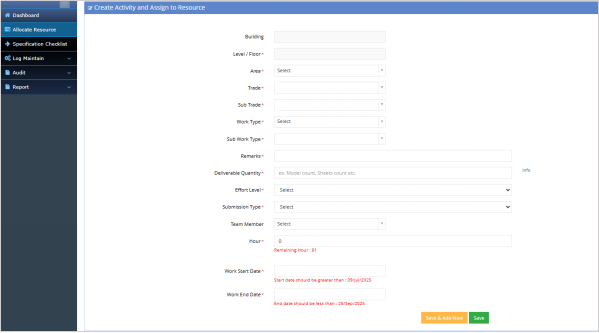
The Assign to PM section in the Allocate Resource module allows Project Managers (PMs) to create and assign specific activities to team members within a project. This section includes a form that enables the PM to define crucial details related to the task, such as the building and floor where the activity will take place, the trade and sub-trade involved, and the specific type of work required. The PM can also set the expected start and end dates for each activity, along with the total hours allocated.
A team member is assigned to the activity, and the required number of hours are logged to track resource utilization. By filling in these details, the PM can effectively allocate resources, track progress, and ensure the timely completion of tasks within the defined project schedule. This functionality ensures that all project activities are clearly defined, assigned, and managed, helping maintain project flow and organization.
View:
PM Account > Allocate Resource > Action Dropdown > View
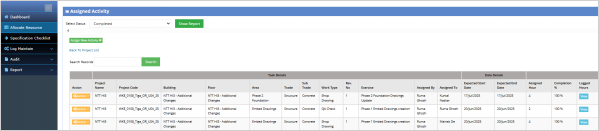
The "View" option allows the PM to view the details of a selected project activity. This includes information about the task, team member, allocated hours, and progress. It's a way to quickly check the status and verify if resources are effectively utilized or if any adjustments are needed.
RFI:
PM Account > Allocate Resource > Action Dropdown >RFI
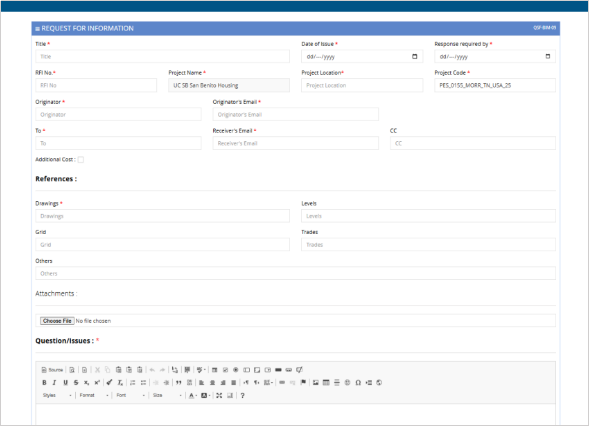
The "RFI" option allows the PM to request additional information regarding a project. It is useful when there are gaps or unclear details that need clarification before proceeding further.
Fill Project Activity:
PM Account > Allocate Resource > Action Dropdown > Fill Project Activity
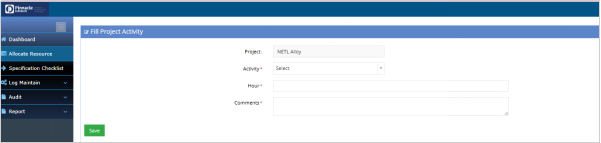
PMs can use this option to track time spent on various project activities, ensuring that all tasks are documented and the project’s progress is accurately recorded.
View Project Activity:
PM Account > Allocate Resource > Action Dropdown > View Project Activity
The "View Project Activity" option enables PMs to access and review previously logged project activities. It provides a quick overview of tasks, hours worked, and comments, allowing the PM to evaluate the project’s current status and make adjustments as needed.

MOM Module:
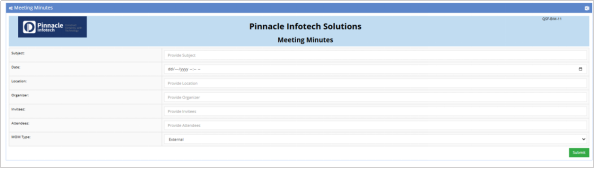
The digital version of the MOM (Minutes of Meeting) module is designed to streamline and enhance the process of recording, managing, and tracking meeting agendas, discussion points, and action items for projects.
BPMS > PM Account > Allocate Resource > MOM
PM have the option to create MOM for any specific Project and can take printout of the same. PM can also create multiple MOM for a Project.

Click on “Add MOM” to add new MOM.

KOM Module:
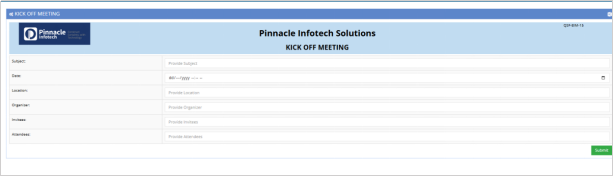
A KOM (Kick-Off Meeting) module is essential for initiating a project, aligning all stakeholders, and ensuring that everyone is on the same page. When incorporated into a digital tool, the KOM Module can streamline the process, enhance communication, and improve overall project success.
BPMS > PM Account > Allocate Resource > KOM
Click on “Add KOM” to add new KOM and to see the detail, click on “View”.

POA Module:
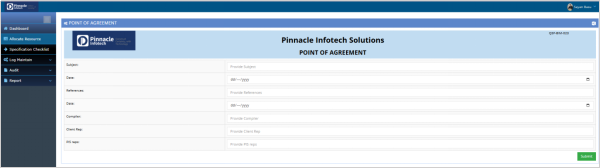
The Point of Agreement module used to keep track of agreement points for a Project and PM can fill the POA from the PM Account of BPMS.
BPMS > PM Account > Allocate Resource > POA
PM have the option to create POA for any specific Project and can take printout of the same. PM can also create multiple POA for a Project.
Click on “Add POA” to add new POA and to see the detail, click on “View”.

Submission Checklist Module:
PM can fill the Submission checklist form for any Project to ensure the tasks need to be completed before submitting the project.
BPMS > PM Account > Allocate Resource > Submission Checklist
Click on “Add Submission Checklist” to add new submission checklist. Click on “View” to view and print the details.


Risk Assessment Module:
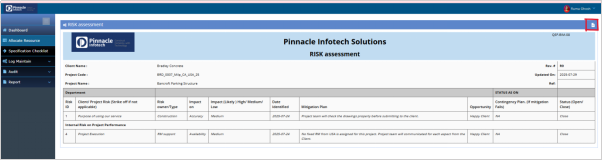
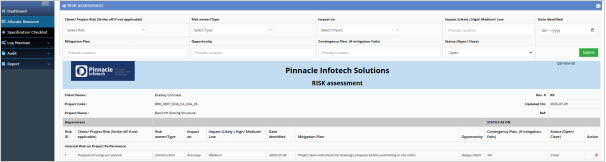
The risk assessment module is Project specific and it could be used to add all possible risks associated with the Projects. You can update this form to add risk during the course of executing the Projects. The revision will be automatically updated by the System for every update.
BPMS > PM Account > Allocate Resource > Risk Assessment
Click on “View” to view and print the details.

Specification Check-List MEP:
The primary objective of specification checklist module is to digitize all the excel based Specification checklist and incorporate in BPMS PM module where the Spec sheet will be created for every Project by PMs and replacing the existing manual excel work.
Also, based on the parameter and value filled by PM for any specific checklist , the system generates rules based on a standard that is applicable for that Model of the Project. These rules could be fed to Revit for QA and validation purposes.
BPMS > PM Account > Specification Checklist
PM can view and create new specification checklist for any specific Project.
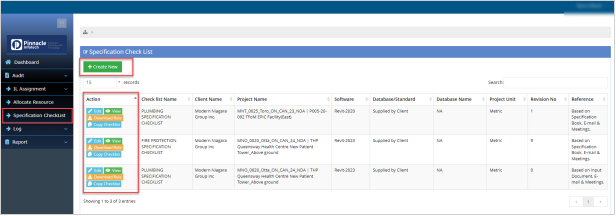
Click on “Create New” button to create new checklist. In this page there are multiple tabs containing different fields. PM can insert or update the data as per their requirement.
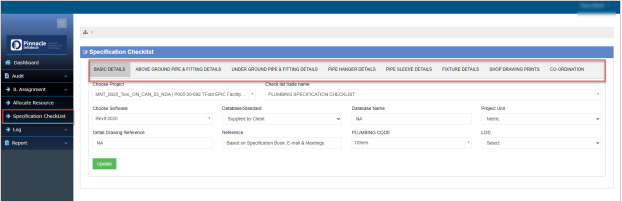
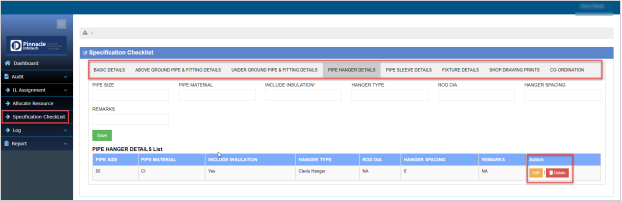
From the data list user can update or delete the record as well.
From specification checklist, click on “View” button to get the detail view of the checklist. User can take the print of the filled checklist from this page.
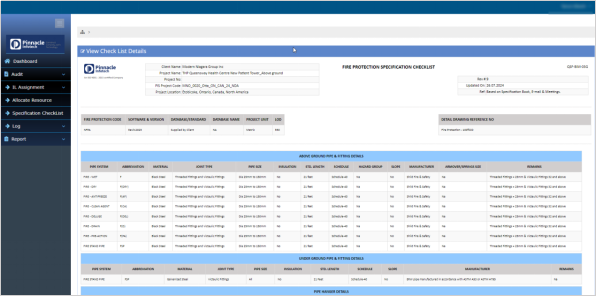

User can copy a checklist from the existing checklist for any Project. It will save time to fill the same data for similar kind of checklist.
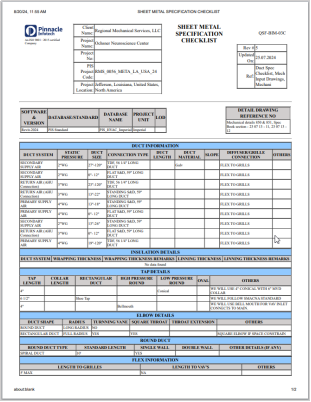
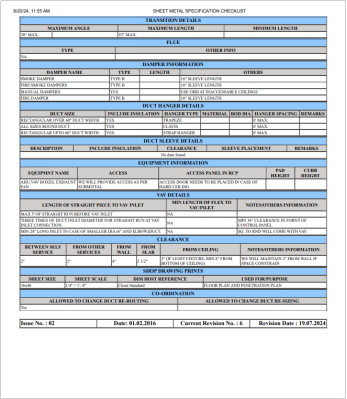
The checklist will be printed as per the below format.
QC Allocation Process (PM/TM Account):
This OR Assignment Help Documentation outlines the updated workflow for managing Quality Control (QC) activities and Shop Drawing activities, designed to create a more streamlined, automated, and efficient collaboration between Team Members and Project Managers. By eliminating manual tasks such as tag management at the PM end, the process enhances overall efficiency, improves system performance, and ensures more accurate and reliable record-keeping.
Uploading Documents:
The Project Managers (PMs) will upload the Output Register files and QC Checklists (only for QC Requests) to the system.
Generating a Request (TM Account > OR Assignments > OR Details) :
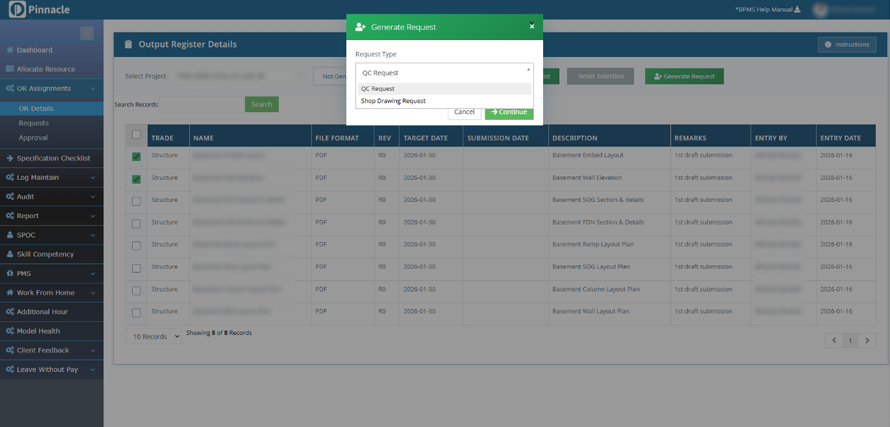
Team Members have to select the eligible projects (projects where Output Registers are present) and Click on Show Report.
They can easily view the Output Registers and QC Checklists (applicable only for QC Requests) from the page.
To generate a QC or Shop Drawing request, select the relevant Output Registers and click “Generate Request.”
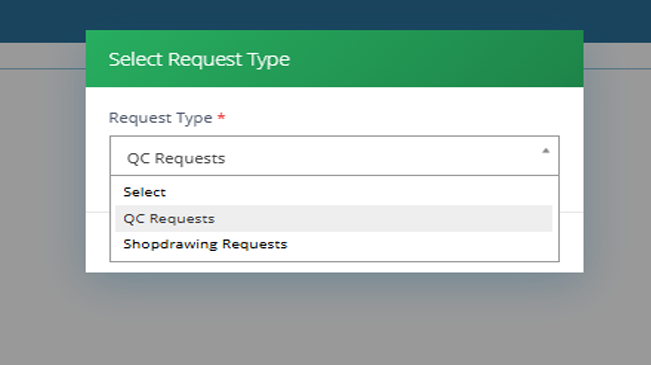
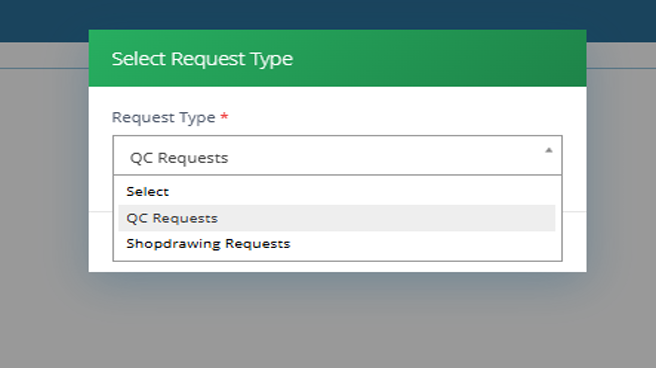
A popup appears requesting users to select the relevant request type (QC Request / Shop Drawing Request).
--> Update:
Users can now select the same file(s) for other requests via Generated Filter › Files › Generate Request.
Generate Request Form:
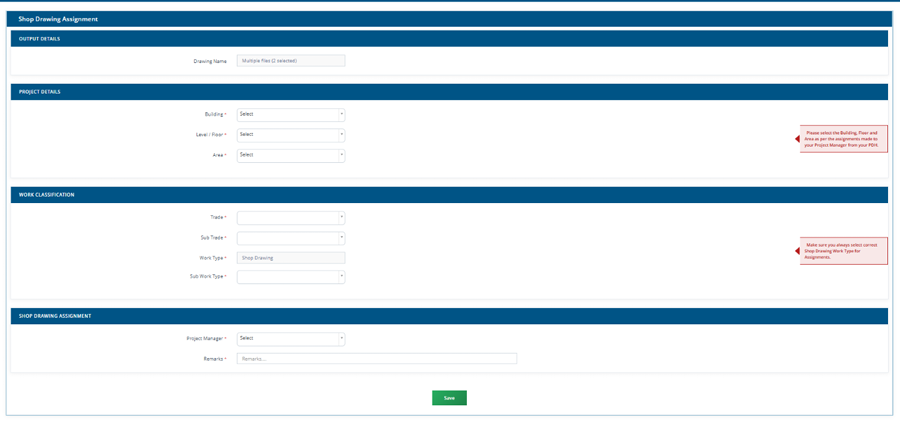
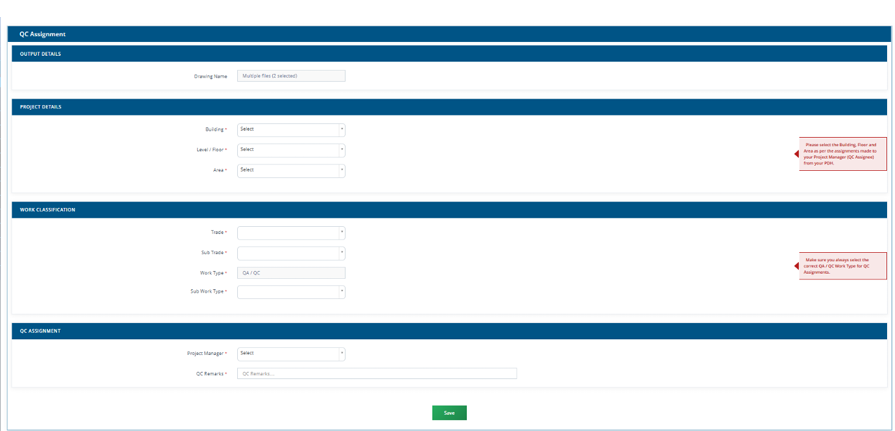
A request form will open with the following fields:
Drawing Name: shown for a single Output Register, or a count when multiple ORs are tagged.
Building Details: all buildings created for the project appear in the dropdown.
Floor Details: all floors relevant to the selected building appear in the dropdown. Area/Zone Details: all area/zones relevant to the selected building and floor appear in the dropdown.
Trade / Sub Trade / Work Type / Sub Work Type: all relevant categories and work classification data appear in the dropdown.
Remarks: Team Members enter relevant remarks.
Project Manager: the name of the Project Manager relevant to the project and team-structure hierarchy appears here.
--> Important Notes:
Team Members must ensure that the selected building, level and floor, and the Request Assignee (Project Manager), match the assignments already made from the PDH to the respective Project Manager. If it mismatches, the assignment cannot be approved. Team Members should always select the correct Work Types accordingly.
Tagging QC Checklists:
After the QC assignment has been saved successfully, the Tag Checklist popup appears, and users can automatically tag the relevant checklists and click Close.
Assigned Request:
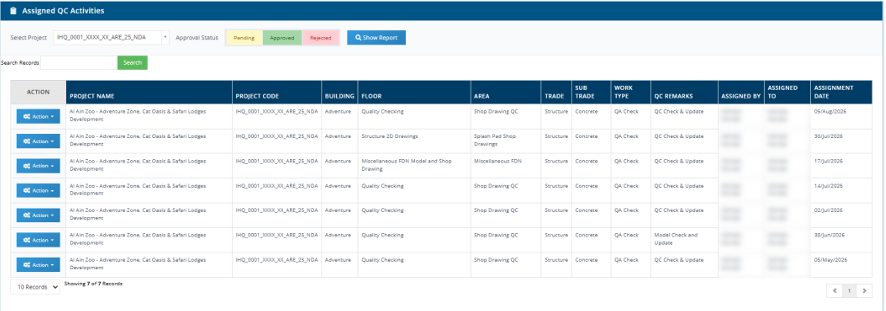
Team Members / Project Managers can view their Assigned requests from this page after selecting the relevant request type.
They can modify the activity, view tagged files and checklists, and tag checklists if missed while generating QC requests.
Once a request has been approved, it is no longer possible to modify the assignment.

Project Manager Approval (PM Account > OR Assignments > Approval):
Assignment Requests:
Project Managers can view their Assigned requests from this page after selecting the relevant request type.
The Project Manager has complete authority to approve or reject assignment requests made by their respective Team Members.
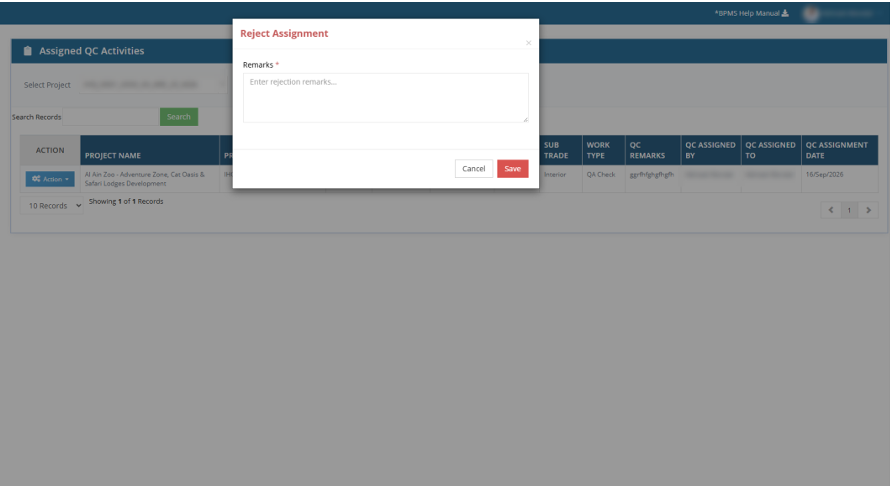
If an assignment made by a Team Member seems unfit for the QC or Shop Drawing process, the PM can reject it by entering the specific reason for rejection.
Assignment: QA/QC Activity / Shop Drawing Activity:
Assignment Approval:
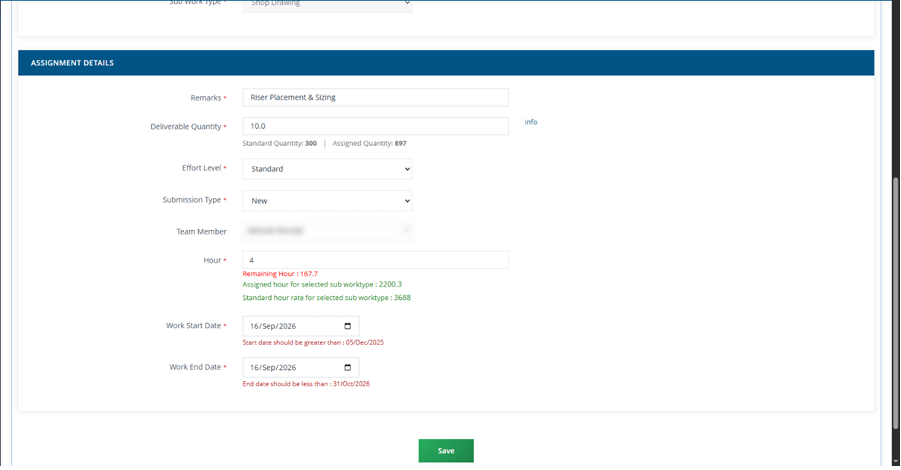
Once the Project Manager clicks Approve, the activity assignment page opens with the already submitted metadata. The Project Manager needs to enter specific details, such as:
• Remarks
• Deliverable Quantity
• Effort Level
• Submission Type
• Team Member
• Billable Hour
• Work Start Date
• Work End Date
Once data has been saved, the Project Manager has the option to modify the assignment activity and update any available details.
Once the activity has been logged, the Project Manager can only update the Billable Hours and End Date of the assignment.
Activities assigned will be available under Log Maintain › Work Assignment.
--> Important Notes:
Validation Rules:
Standard Rate Validation will be available and applied on correct trades and effort levels wherever applicable.
For Shop Drawing assignments, Quantity Validation will be applicable for recent projects.